


 {{ wordsItem.word }}


 {{ scoreList[Math.floor(Math.random() * 3)] }}


When Wear&Go wigs were introduced and marketed by ISEE in 2022, they quickly became popular in the wig business. With innovation in mind, recently, we upgraded our technique to develop the bleached tiny knots Wear&Go wig.
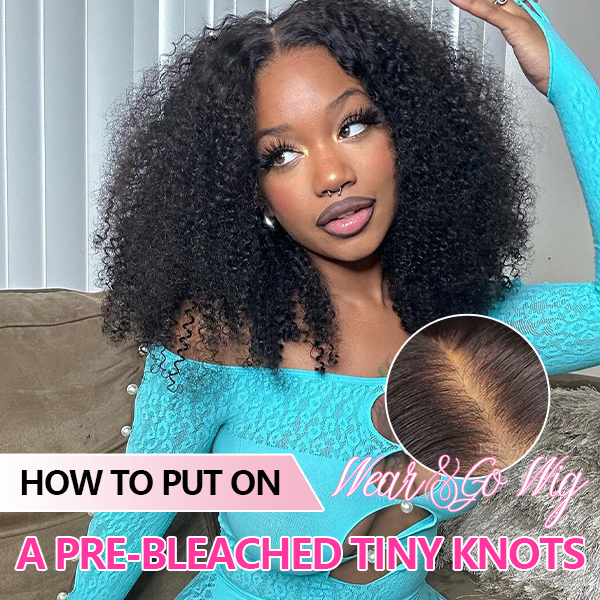
However, properly putting on a bleached tiny knots Wear&Go wig with precision is key to maximizing its potential. So in this blog post, we'll take you through a step-by-step guide on how to put on a bleached tiny knots Wear&Go wig and related maintenance tips.

Understanding What Is a Bleached Tiny Knots Wear&Go Wigs
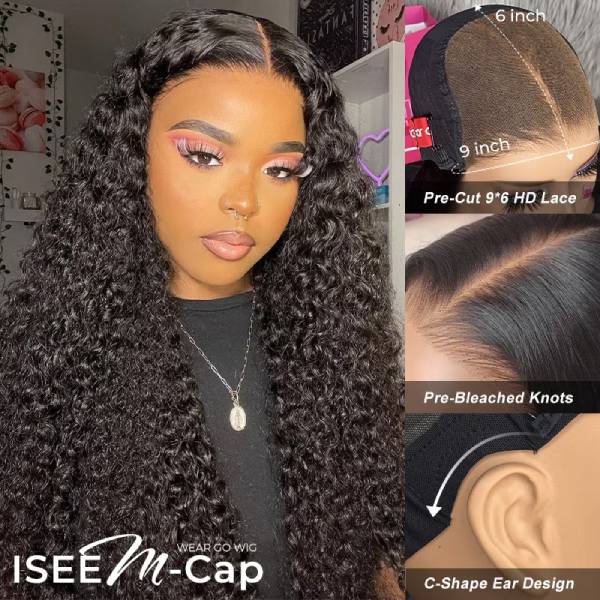
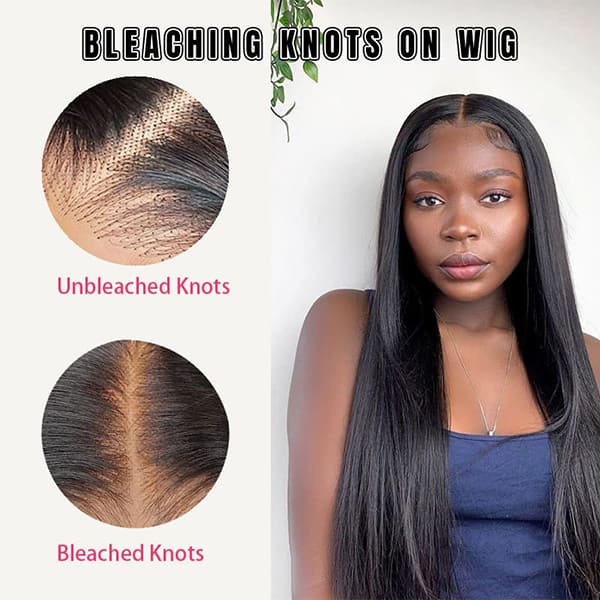
"Bleached tiny knots" in the context of wig construction refer to a technique used to mimic the growth of natural hair from the scalp and create a more natural and realistic appearance. It is a new technique developed by ISEE on Wear&Go wigs that is presently exclusively applied to ISEE Wear&Go V5 and ISEE M-cap 9×6 wigs, with the goal of making Wear&Go wigs the most realistic when putting on while giving people as little as possible to detect you are wearing a wig.

How To Install a Wear&Go Wig a Step-By-Step Guide
This is going to be a very easy and straightforward install process that's beginner friendly. Without further ado, let's witness it together.
Step 1: Preparing your Natural Hair
The main purpose of this step is to make your natural hair as flat as possible. Flatten your hair is a step that no one should skip and no types of wigs should miss, even Wear&Go wigs. Because the wig could sit too high on your head if you apply it on unprepared hair. This would make it obvious that you are wearing a wig. Want know more about specific and detail ways to prepare your hair? Please shift your attention on our another blog post how to hide hair under a wig cap.
Step 2: Put on the wig cap
Put on a wig cap to hold your natural hair in place and create a smooth, flat surface for the wig to sit upon.
Stretch the wig cap over your head. It should fit snugly and comfortably, covering all of your natural hair. Tuck in any loose strands.
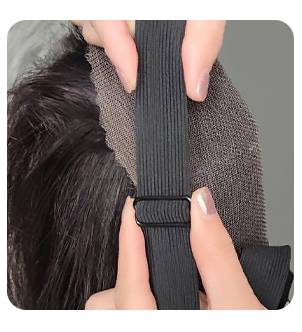
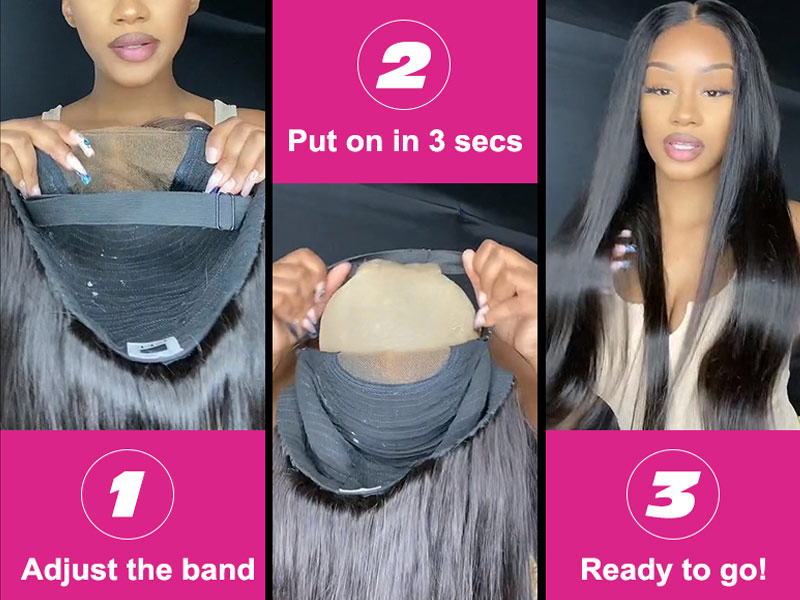
Step 3: Adjust the elastic band
For a bleached tiny knots Wear&Go wig, the 3D Dome cap has an elastic band inside. To make sure it fits properly, hook the piano keys in the appropriate spot to adjust the band's tension, make it tighter or looser. Everybody has a unique head size that varies from person to person.
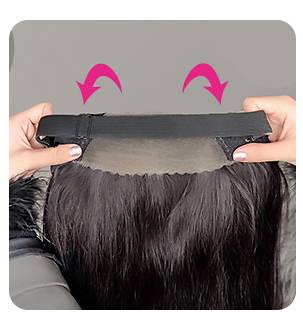
Step 4: Fold the lace edge in reverse
By pre-folding the lace edge in reverse and securing it in this manner, you'll maintain a smooth and natural-looking hairline when you wear your wig. This prevents any unsightly folding or bunching of the lace and contributes to a seamless and realistic appearance. This is a critical but easily overlooked step for Wear&Go wigs.
Step 5: Put on the wig
You may experience 3 seconds of quick and effortless wearing after completing the steps listed above.
Begin by aligning the lace edges of the wig with your forehead. Make sure that the front edge of the wig, where the lace is attached, sits along your natural hairline for the most realistic appearance and reducing unnecessary adjustments in later steps.
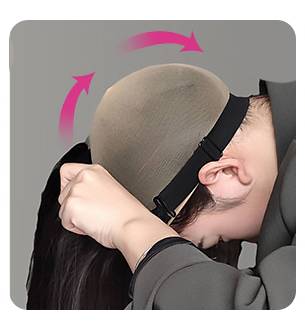
Then, with your head slightly tilted forward, pull the elastic band at the back of the wig, ensure that it is ready for use. Make sure to attach the elastic band first for a secure fit.
Lastly, with a fluid motion, slide the wig backward, and finish attaching the wig.
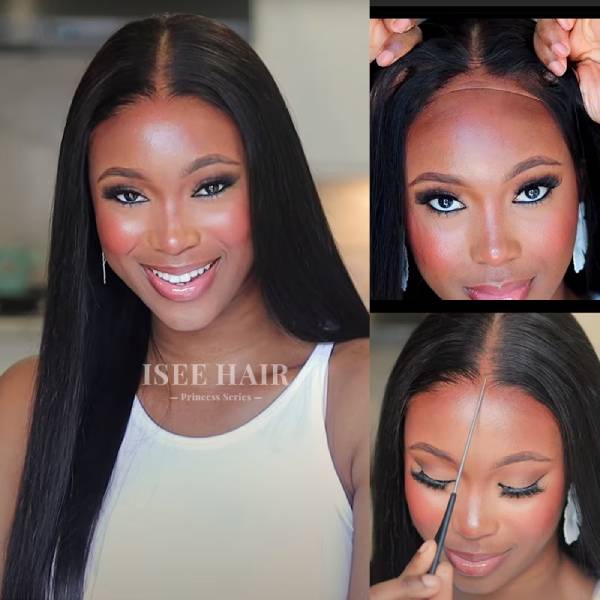
Step 6: Final adjustment
In the mirror, adjust your hairline to the proper place for a flawless fit!

Note: Throughout this process, take care to avoid pulling the front hair and lace away from your forehead. Instead, gently guide the wig into position without disrupting the lace and hair strands along the front.
The Importance Of Proper Installation
Absolutely, properly installing is incredibly important for any types of wig. Here are a few reasons why proper installation is essential for a bleached tiny knots Wear&Go wig:
Longevity and Durability
Proper installation techniques can extend the lifespan of your bleached tiny knots Wear&Go wig. When the wig is secured correctly, there will be less tension on the hair strands, reducing the risk of breakage or shedding. Additionally, a secure attachment will prevent the wig from rubbing against your natural hair, preserving its quality over time.
Comfort and Confidence
A well-installed Wear&Go wig should feel comfortable and secure, allowing you to go about your day with confidence. When the wig is properly attached, you won't have to worry about it shifting or coming loose unexpectedly. This peace of mind will help you feel more comfortable and at ease in any situation.
Realistic Appearance
By following the correct installation techniques, you can ensure that your bleached tiny knots Wear&Go wig looks as natural as possible. The carefully bleached knots and secure attachment will create a flawless hairline that mimics the appearance of natural hair. Proper installation will prevent the wig from looking bulky or ill-fitting.
Tips For Maintaining And Caring For Your Bleached Tiny Knots Wear&Go Wig
Once you have successfully installed your bleached tiny knots Wear&Go wig, it's important to maintain and care for it properly to ensure its longevity and keep it looking its best. Here are some essential tips for caring for your wig:
Gently brush-It's crucial to brush your bleached tiny knots wig as gently as possible. Your fingers are the best tool for removing any tangles or knots, so try to utilize them. Or you can use a wide-toothed comb or a wig brush. Being careful not to pull or tug on the hair strands.
Properly store-Avoid storing your bleached tiny knots wig in a plastic bag or airtight container, as this can cause moisture buildup and damage the hair fibers.
Knot Maintenance-To maintain the appearance of the bleached knots, avoid harsh or excessive brushing or combing near the knot area. Gentle handling will help preserve the bleach treatment.
Wearing a wig cap-Wear a wig cap underneath your wig to protect small knots from friction and rubbing. This not only prevents the wig knots from falling out and creates a barrier between the wig and the scalp, but it also helps to keep the wig securely in place.
How Do You Keep a Bleached Tiny Knots Wear&Go Wig From Slipping?
ISEE Wear&Go wigs have an adjustable elastic band at the back. This band is designed to secure the wig in place. If you find that the wig is slipping or feels loose, carefully adjust the elastic band to make it tighter. If it feels too tight or uncomfortable, you can loosen it slightly for a better fit. It should feel secure but not overly tight.
How Long Does a Bleached Tiny Knots Wear&Go Wig Last?
The lifespan of a bleached tiny knots Wear&Go wig depends on various factors, including how well it is maintained, and how frequently it is worn.
With proper care and maintenance, these wigs can last anywhere 1-2 year with proper care or even more.
Conclusion
By following the step-by-step guide and incorporating the tips and precautions mentioned in this article, you can not only effectively extend the lifespan of a bleached tiny knots wig, but achieve a flawless and natural look that enhances your beauty and boosts your confidence. So go ahead, embrace the convenience and beauty of a Wear&Go wig!
You might want to check these posts:
Unlocking the Secrets of Tiny Knots Wig Care: A Comprehensive Guide
What Is a Glueless Lace Wig?
New Natural Kinky Hairline Wear Go Pre Cut Kinky Straight Glueless Wig
ISEE M-Cap Water Wave 9x6 Tiny Knots Pre-Bleached Wear Go Wig


