HOME M-Cap 9*6 Wear Go Wig Wear Go Half Wig Invisi Drawstring 360 Wear Go Wig Wear Go Wig V5 13*4 Wear Go Wig Color Wear Go Wig Short Bob Wear Go Wig No Leave Out V part New Arrivals Block Wig Block R (Replaceable Top) Block B (Bottom Base) Starter Set Hair Bundles Bundles With Closure Bundles With Frontal 1 Bundle Deal Single Closure/Frontal Clip-ins Ponytail Accessories & Lashes Best Sellers

Mother's Day

Sale

Clearance

Sale

Wigs Under

$120

USA

Shipping

Trendy

Color

Set Descending Direction

6 Item(s)

How To Put On A Lace Front Wig Without Glue

Friday, December 2, 2022 4:33:15 AM America/New_York

As wigs industry grows, wig seller have designed more and more easy to install wigs and still looks very natural. So now you don't have to deal with your lace closure or lace frontal, and you still can get a very natural looking hair. In this article, here are tips and steps on how to install a lace front wig without glue.

Tips When Putting On A Lace Front Wig

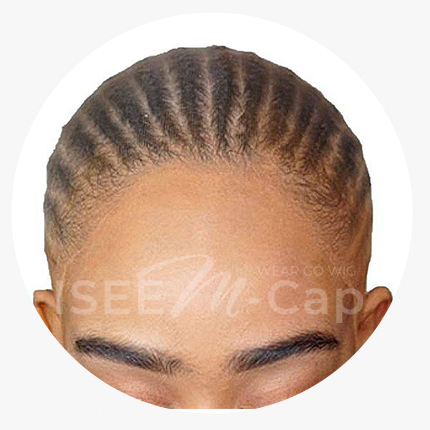
1. Braided your own hair and wrap it on top of your head.
2. Take a hair net, and adjust it to make sure all natural hair are covered.
3. Spray some hair gel.
4. After hair gel is dry, trim the extra edge of the hair net in the front and sides.
5. take the wig and wear it from the front to the back.

How To Put On A Lace Front Wig Without Glue

1. Choose new design wear go lace wig
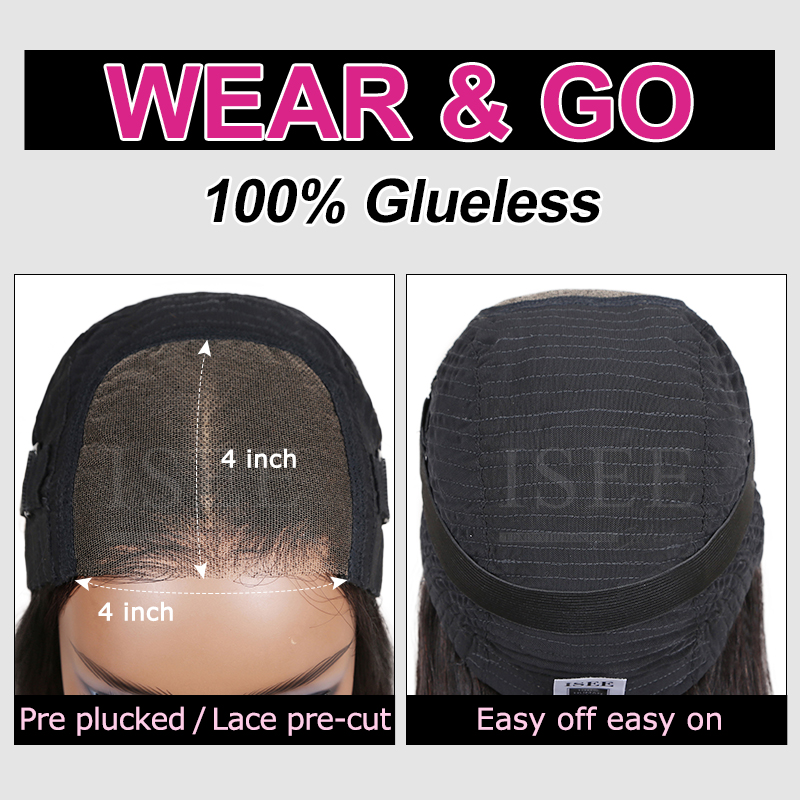
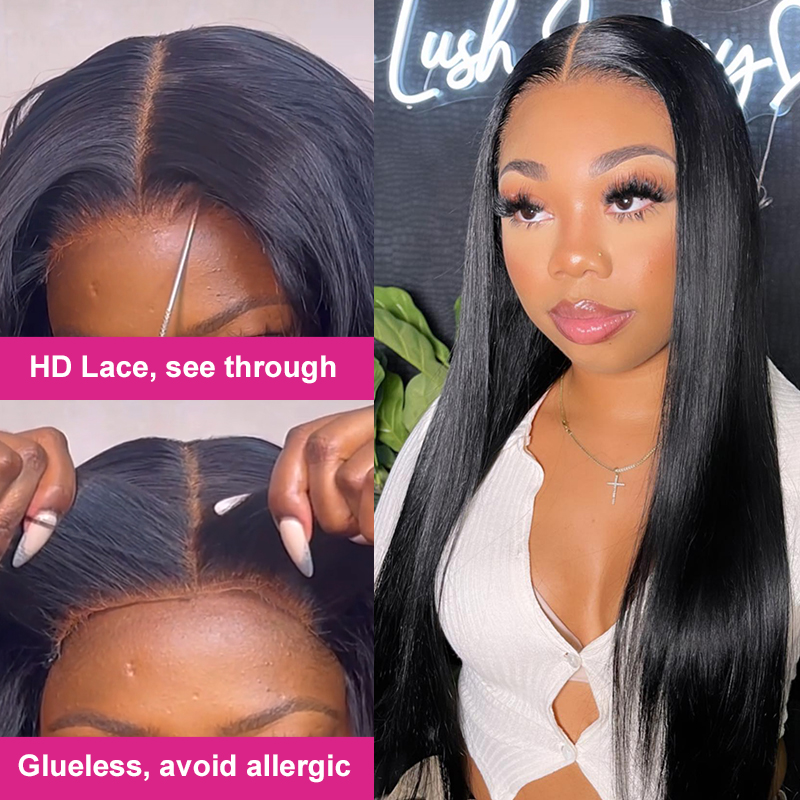
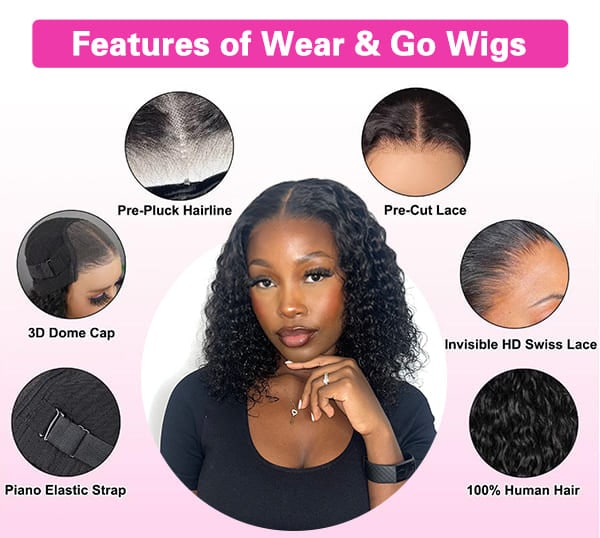
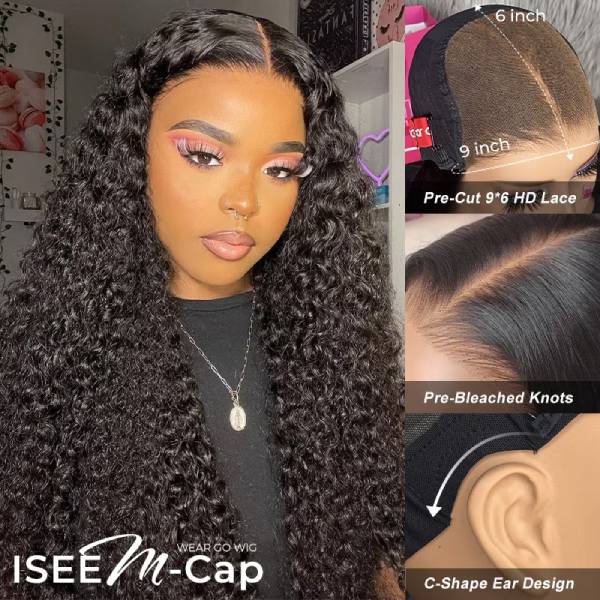
Isee hair new design wear go wig apply 4x4 and 13x4 hd lace front, hd lace for matching all skin tones, 100% virgin human hair for most natural hair look and soft touch. Pre-plucked natural hairline. Pre-cut clean lace in the front. Pre-bleached knots.

2. Apply lace front wig without glue
a. wear it from front to back.
b. Adjust your wig, make it cover the hair net and you are ready to go.
c. you can restyled your wig as you want: flat iron to curl pattern or straighten it.

Image of how to put on lace front wig without glue

image on how to put on lace front wig

Inner of New glueless lace front wig

inner of lace front wig without glue

new type lace front wig

Video of how to apply lace front wig

Comments | Posted in Wig Install By lou ruili

How to Make A Wig Hand Sewn & Sewing Machine Method

Monday, January 9, 2023 1:59:30 AM America/New_York

I'm doing a step by step detailed process of how to make a wig for a beginner by hand sewing or machine sewing method. You can use a lace frontal or a closure with 3 to 4 bundles, we are going to be using a frontal and 4 bundles to create a custom wig.
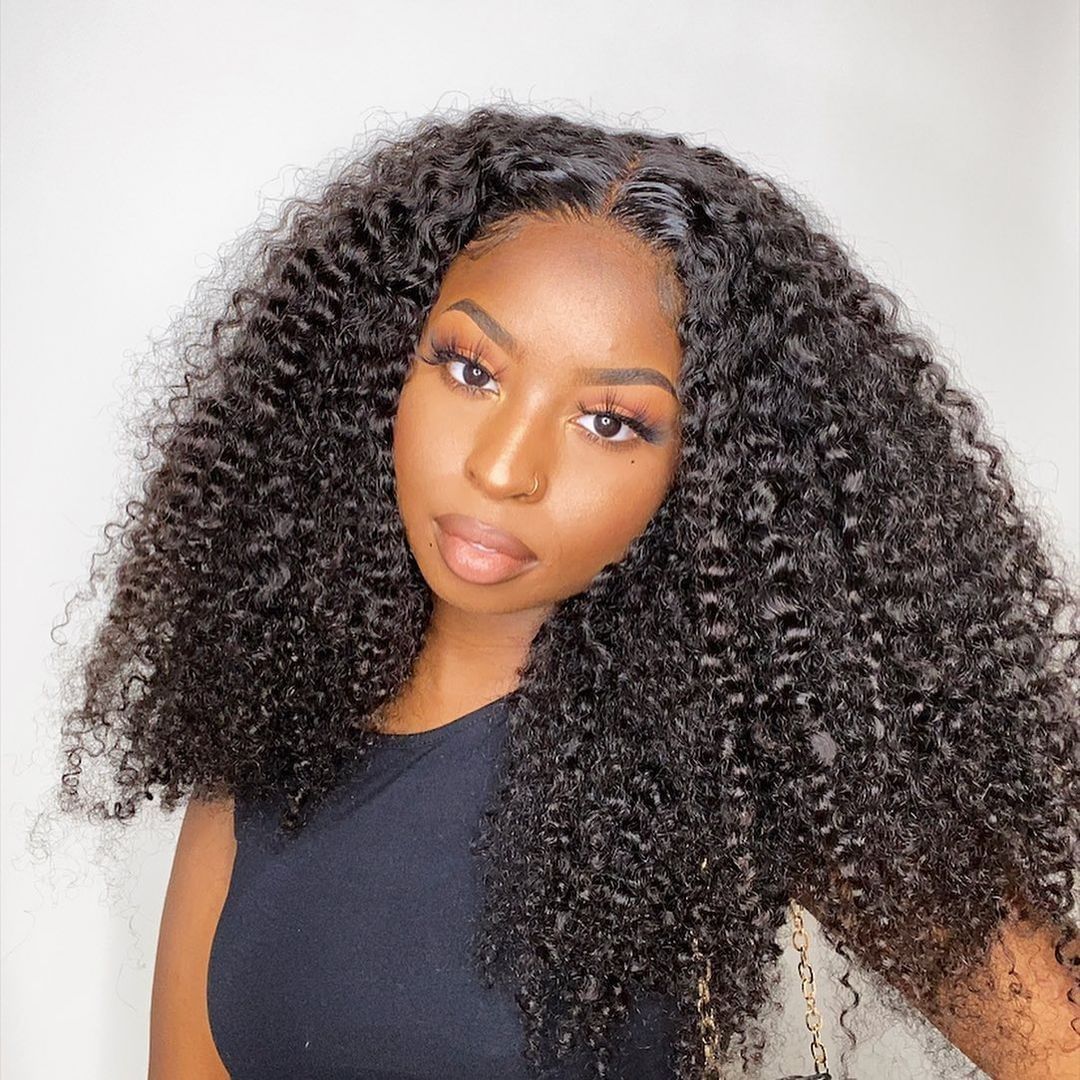
how-to-make-a-wig-hand-sewn-and-sewing-machine-method

Thing You Need To Make A wig

Prepare a lace frontal or a closure, pairing with 3 to 4 hair bundles to make a wig.

Next you will need your wig cap, I recommend use a mesh dome cap if you are a beginner.

You will also need a marker. A white or metallic marker that will show up on the dome cap.

You will also need a mannequin head. I do recommend a canvas mannequin head, just makes wig making easier. They come in different sizes and inches based of your own head measurements.

You also need a needle and thread. If you are here to make one by sewing machine, you will use the needle and thread that comes with your machine. And if you are making one by hand, you need a curved tip needle, it goes without saying.

You also need scissors, to cut bundles and thread.

You will also need t-pins, to help aid you in the construction of your wig.

How To Make A Wig Step By Step

1. First thing you want to do is place the dome cap on to the mannequin head. you want to make sure that it is centered. And then you're going to use two t-pins to pin down the nape of the cap to mimic the hairline of your nape.
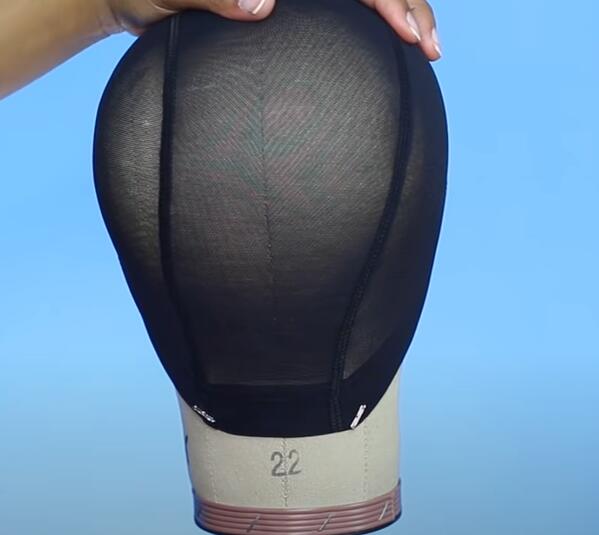
How to Make A Wig pin down wig cap

2. Next you want to start the foundation for your wig.

Place your frontal or closure and pin it down.

So you are going to center your frontal or your closure on top of the mannequin head on top of the dome cap. Then you are going to begin to pin it down, so you want the front of the closure or the frontal about 1/4 of an inch in front of the dome cap. After you pin the center pinning, the sides should be very easily. The only thing you need to do is just pin them straight down, so the end of the closure should be pinned right at the end of the mesh dome cap.
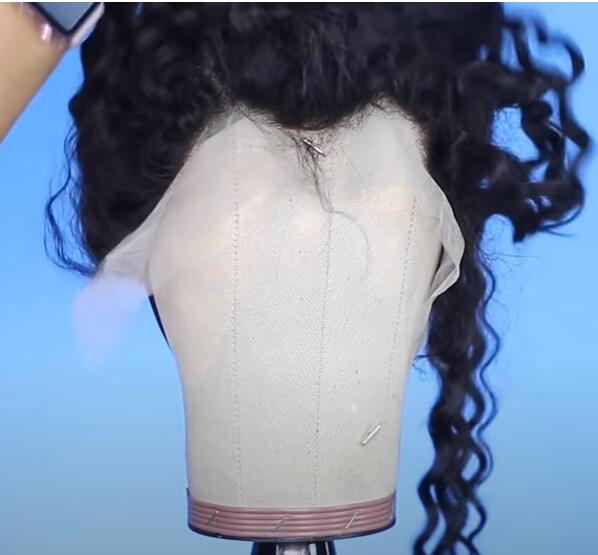
How to Make A Wig pin down a lace frontal

Trace the outline onto the cap.

This is where either your metallic marker or your white marker comes into play. So using the sharpie and basically what you want to do is just trace the outline of either your closure or your frontal onto the mesh dome cap. After you've done that, then you want to draw the foundation for laying your wefts. Try to make drawing line as straight as possible.

If you are using a sewing machine for this method, I would suggest making the lines about a finger width apart. If you are sewing them by hand, I would make them a little bit closer together, maybe like a pinky finger apart.
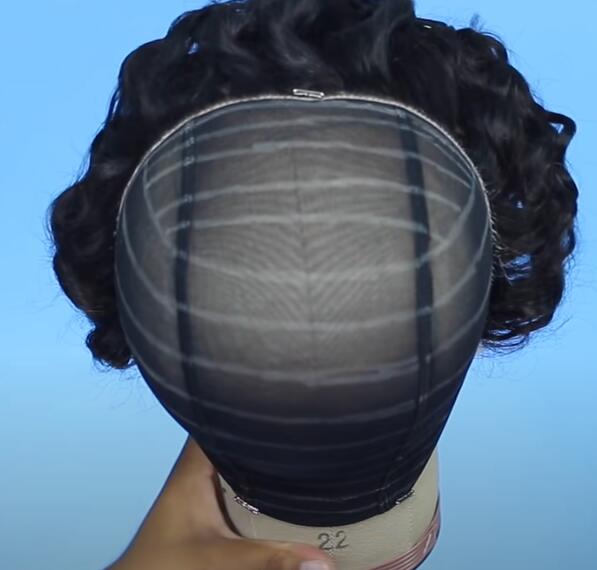
How to Make A Wig trace the outline onto the wig cap

You also want to keep in mind how many bundles you are using. Of course if you are trying to fit four or five bundles, you want the lines way closer together. If you are only doing two or three bundles, you want the lines further apart.

If you are using a closure instead of a frontal, you want to do the exact same thing, and you just continue to make your lines curved around the closure at the crown of the head. so this is what your foundation should look like.

Hand sewing in weave to make a wig

Now we are going to get into how to hand sew.

First, you need some thread and tie a knot. Cut around an arm's length of thread and then you want to thread one end of the thread through the curved tip needle. Like so you want to even out the thread. so you can begin to make the knot that will be at the end. And what I'm going to do is do this twice, so that it is nice and secure.

When sewing by hand you want to line the weft up with the lines on the mesh dome cap. You want to put the needle through the dome cap, and then you want to put the needle through the track. So after you put it through, then you are going to feed the needle through the hole of the thread. And this is going to create a more secure start by creating a knot at the beginning of the weft.
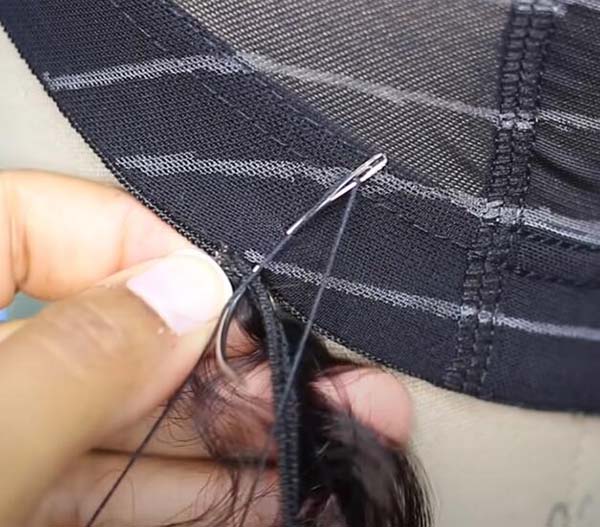
How to Make A Wig hand sewn in a wig

As you continue to sew the weft on. Two things are important, you want to go through the mesh dome cap but around the track, and then when you are bringing the needle through you want to bring it through the loop of the thread on the left. This is important because you want to go around the track to preserve the longevity of the weft. And you want to make sure you're bringing that needle through the loop of thread, because that is going to create a more secure and strong sewing pattern.

So once you get to the end of your track, you are once again going to go through the weft. So first, you want to go through the dome cap, then you want to go through the weft, then you want to create a knot, the way that I do that is you're going to wrap the thread around your needle two to three times. And then once you pull the needle through, you will pull it tight and pull it taut and it creates a natural knot.

And once you finish with that, you can cut the end of the thread, and then you can cut the end of the track, and start over again. So at this point you have successfully hand-sewn a track onto your mesh dome cap, and you would just continue to repeat the process until your wig is finished.

Machine method sewing into a wig

So now we're going to get into the sewing machine method. If you do not know how to operate a sewing machine, I suggest you learn how to do that first. One of the first and most important steps for creating a wig with the sewing machine is doubling your wefts.
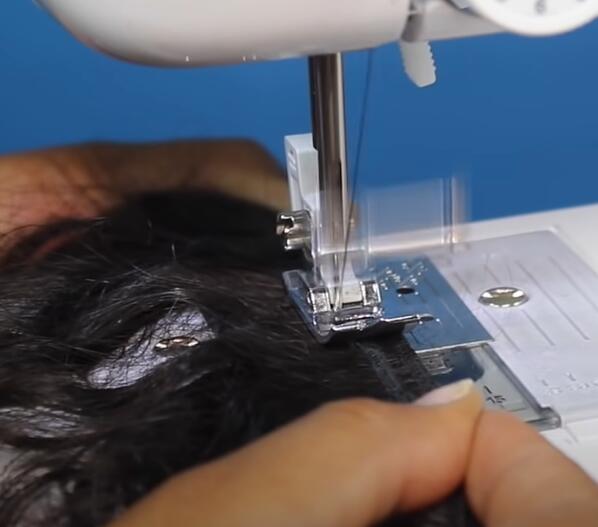
How to Make A Wig sewing into a wig

On your mesh dome cap for this part you want to use a zig-zag pattern. and then you're going to begin to sew. You want to do this all the way to the end of the weft, and you want to do this for all of your bundles.

How to Make A Wig machine sewing into a wig

So the first step that you want to do is line up the mesh dome cap underneath the presser foot. and then you want to grab your weft and you want to line that on top of your tracing line underneath the presser foot. Once you have everything aligned you want to put your presser foot down, and then you're going to begin the sewing process.

Just keep that in mind while sewing the weft on, you want to let the speed of the sewing machine guide you, you can provide a little bit of tension. But you don't want to pull or stretch the cap because that will cause a shrinking. You also want to make sure that you are pausing, ensuring that your weft is still completely aligned.

And that you are following the foundation that you drew with your tricks, and once get to the end, sew all the way through, and then use the reverse to do a little bit of reverse sewing just to make the end more secure, and then just cut the weft. And then with the sewing machine, after you cut the wefts, you also have to cut the thread. So you can use your thread cutter on the side of your sewing machine or you can use scissors.

Once you've got all your weft sewn on either by machine or by hand, then it's time to move back to your frontal or your closure.

Sewing in frontal or closure

You are going to put your wig on your mannequin head, and then you're going to pin down either your frontal or your closure. So you can hand sew this on when sewing down your front or your closure, you want to use the same technique as showed when you're sewing your weft on.

So initially you want to go through the end of the frontal or the closure, and you want to go through the mesh dome cap. You then want to pull the needle through the thread to create that secure start of your sewing. As you continue to sew down the frontal or the closure, you want to go through the end of the frontal or the closure. And you still want to send that needle through that hole of the thread, so that it creates a secure base. When you are sewing, you also want to go through the mesh dome cap as well, so please do not forget that. You want to stitch close together, so that it is very secure.
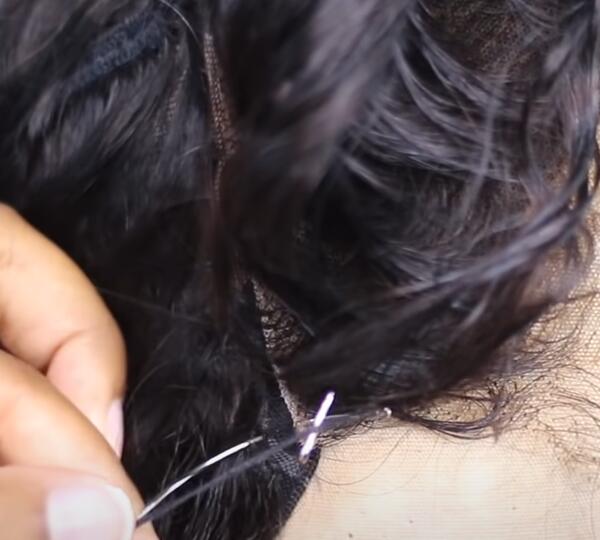
How to Make A Wig sewing in a lace frontal

And you were to continue to sew all the way around until you are finished. So this is the end of sewing a machine made wig.

Whether sewing in by hand or machine method, they both will look nice and neat. If you want to do a glueless unit, you can add it with an elastic band. This is step by step making a wig like a pro for beginners hand sewn and sewing machine method.
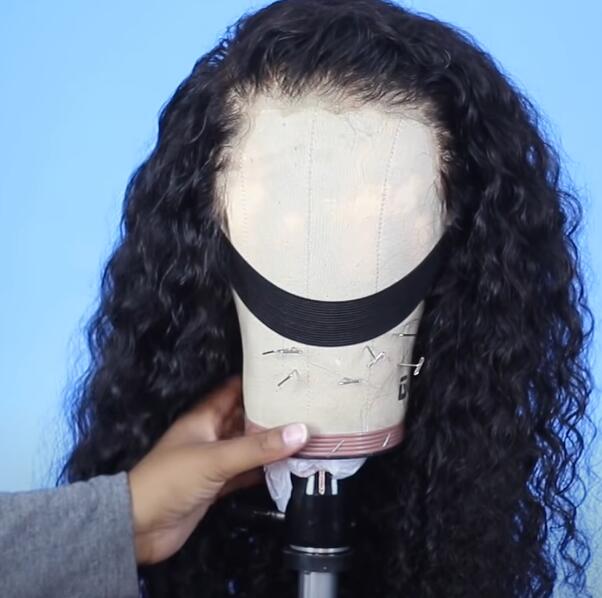
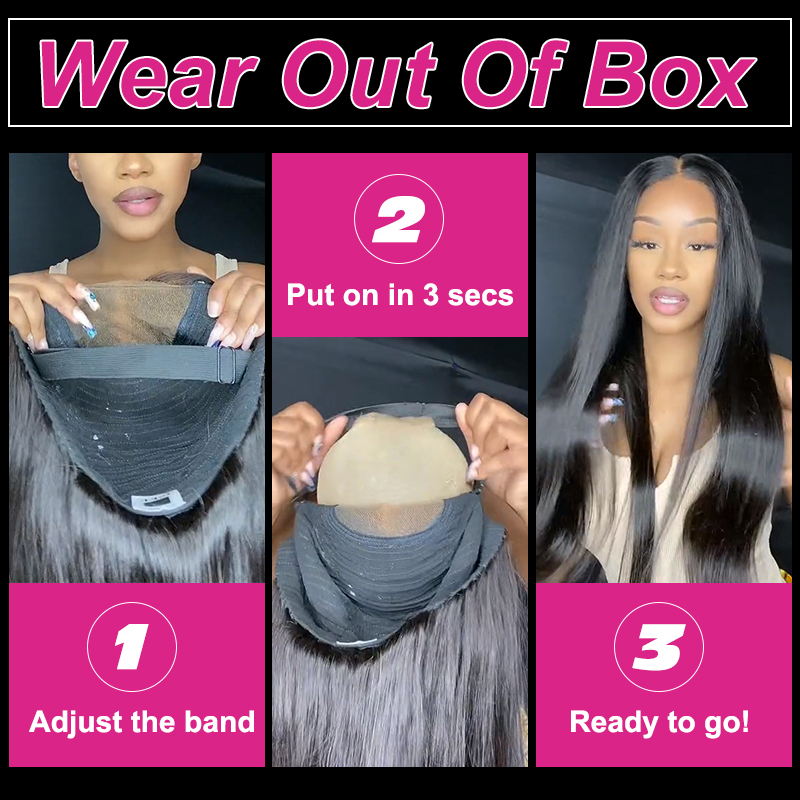
How to Make A Wig

Comments | Posted in Wig Install By lou ruili

How To Bleach Knots On Wig - Complete Guide

Friday, May 26, 2023 6:11:32 AM America/New_York

Bleaching knots on wig is using bleaching techque to lighten the black knots that hair tied along the lace, make your lace wig looks all natural. Bleaching knots will take your wig install to the next level! If you are new to bleaching knots, here you can get all your questions answered. This article give a very thorough tutorial of bleaching knots and easy to follow.

wig knots

Why Bleaching Knots on Wig?

Bleaching knots on wig will make it blend better. We have known that the hair strands are ventilated to the lace with hair knotting method. It will create invisible knots on the lace base. We can bleach the knots on wig to make them less visible and create a more natural appearance of wig.

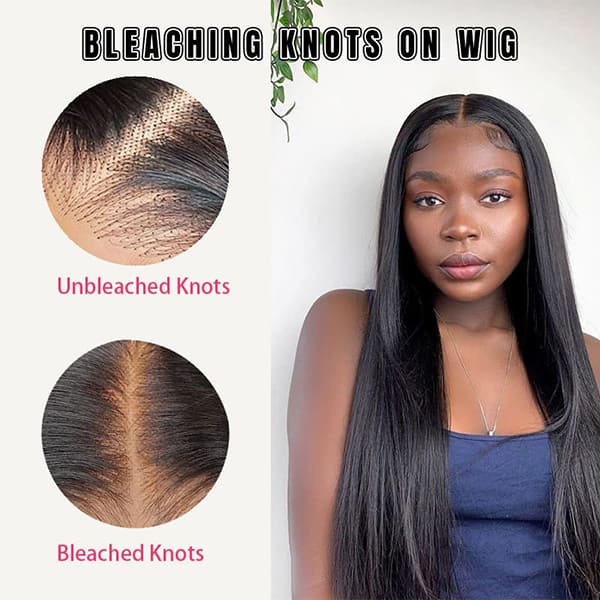
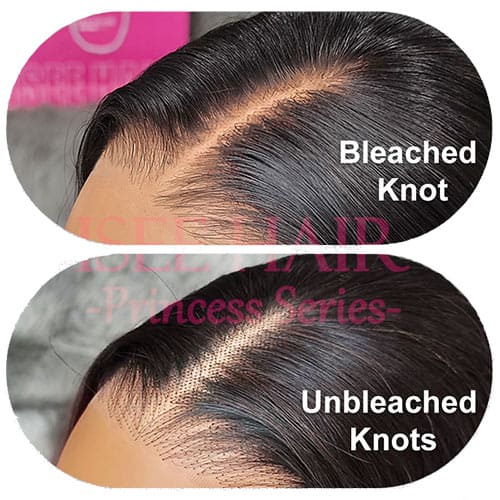
Bleached Knots vs Unbleached Knots

bleached knots vs unbleached knots

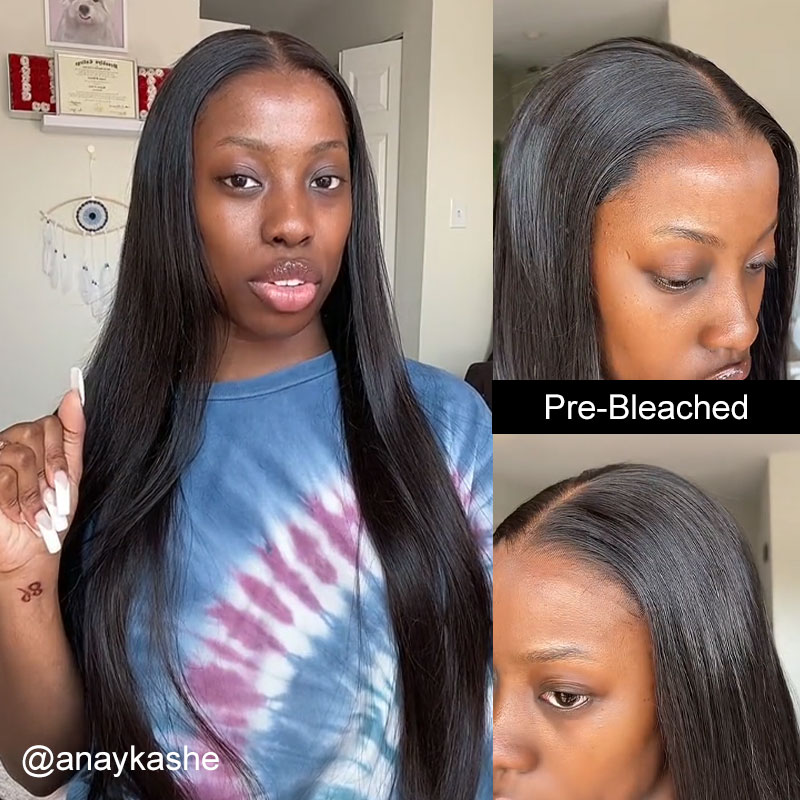
Bleached knots wig has no visible knots on lace base, black knots have been bleached into brownish or blondish color, giving a scalp look. The hair may become more prone to shedding, but if you don’t have trash and messy hair, the shedding won’t be anything alarming just because you knots bleaching.

Unbleached Knots wig has visible black knots on lace base, giving a less natural appearance.

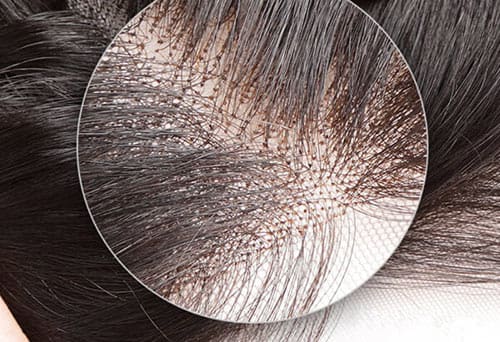
What Are Wig Knots?

wig knots

Wig Knots are tiny knots that hair strands are hand-tied to the lace material. In order to get the hair on the lace, you have to knot the hair into the lace and it forms these black dots along the lace that you can visibly seen once you install the lace. Bleaching knots to make the wig give a more natural appearance.

How to Bleach Knots On Wig

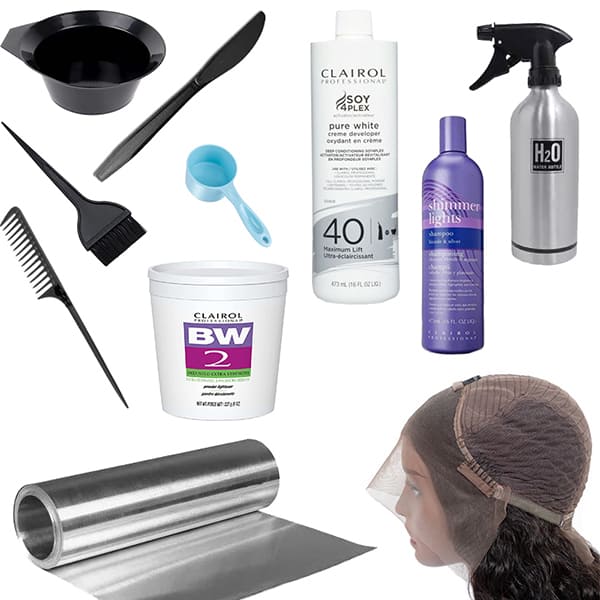
Tools Needed to Bleach Knots

tools products needed for bleaching knot

Bleaching powder
30 or 40 volume developer
Mixing bowl (plastic or glass)
Scoop
Applicator brush
Popsicle sticks or plastic knife
Aluminum foil(optional)
Neutralizing shampoo
Shimmer lights shampoo
Disposable gloves
Water spray
Hair comb
Lace wig

Step to Step of Bleaching Knots on Wig

You could just use a spray bottle of water to wet it up again, and not have to touch it and risk pushing the bleach thru. make sure to secure it away from the area you'll be bleaching to avoid accidental bleaching of the hair.

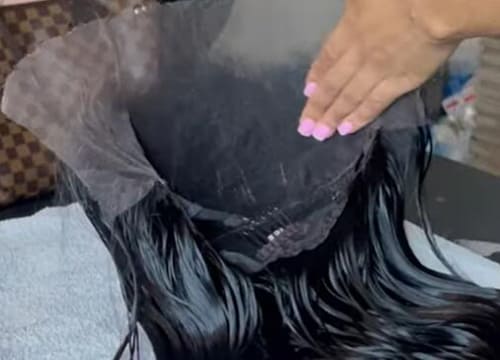
1. Prepare The Wig

prepare wig

First, you want to get your wig well prepared for the bleaching process.

Use a spray bottle of water to wet the hair.
Brush hair back so that they are not lay flat on the lace, to avoid bleach bleeding on the hair.
Blow dry the lace base, make sure the lace is dry and not wet so the bleach can take.
Make sure the lace should be facing up, you can apply bleach easily.

2. Prepare Your Bleach Mixture

prepare bleach knots mixture

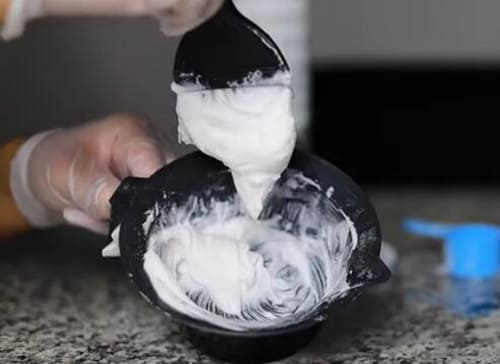
After your wig is ready for bleaching, go to the next step to mix up the bleach powder and the developer in mixing bowl to create perfect bleach mixture.

Mix one scoop of bleach power with two scoop of 30 or 40 volume developer, start with 30 if you are a beginner, the lower the developer the slower the belching process, and it will have less chance to be over-bleached. To mix the developer and bleach according to the wig’s size.

Lace closure wig - one spoon of bleach powder and the developer
Lace frontal wig - one ounce of bleach powder and two ounce of developer
Full lace wig - three ounces of bleach powder and six ounce of developer
If you need more to bleach mixture to coat the lace, mix up some more.

Make sure your mixture not to be too loose or thick. If when you pick it up, the bleaching mixture falling, add more powder. If it is thick, add more developer. Your bleach Mixture looks creamy is good to go.

3. Gently Bleach Knots on Wig

apply bleach mixture

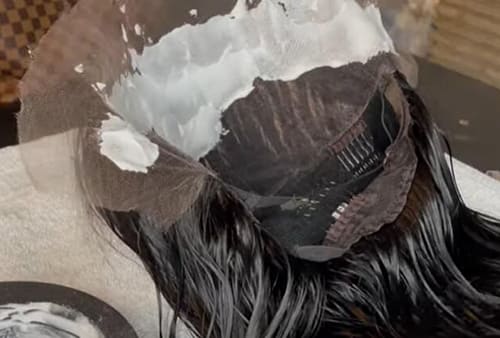
Since you have prepared your bleach mixture, now you are ready to apply it on the lace base to bleach the knots. Use popsicle sticks or plastic knife to apply the bleach.

Apply the bleach: You want to apply the bleach start from the hairline side to side, then go back. Where you put the bleach first, the knots color will fade first, the front lace is the most important part. Apply the bleach side to side, then go back. Make sure to saturate the knots thoroughly and evenly.

Do not go heavy handed. You do not want your bleach seep through and make your roots blonde.

Let the bleach process: Once the bleach mixture applied, cover the bleaching part with aluminum foil to heat up the bleach process, and let the lace facing down. Wait 20-45 mins but check on it every 10-15 mins. After the knots fade down and turn to brownish, or bleached to your desired lightening color, the bleach can be washed off.

4. Rinse The Bleach And Wash The Hair

rinse bleach out

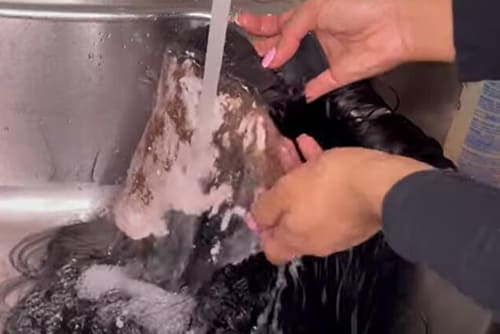
After your wig knots bleached to the level you desired. Use water to rinse the bleach out as much as possible. Wash the hair as well to void the bleach get on the hair and turn your hair blonde.

Use neutralizing shampoo to deeply wash the bleaching part, make sure the chemicals from bleach are completely out the hair and stops the chemical reaction. Then you can use shimmer lights shampoo to tone those konts to make them look more natural.  Add some conditioner to keep the hair soft.

Check the video below on how to bleach knots on wig


How to Fix Over Bleached Knots

If you accidentally over-bleached knots and have bleached the roots of the hair. You can go in and dye them black or just fix your hair root with makeup and a temporary color spray once you install. Or you can use a liquid toner for the knots.

Or you can use shimmer lights shampoo to tone those knots. If your hair roots over-bleached to blonde, you can try purple shimmer lights shampoo, purple works beat to remove blonde from your knots. If your hair roots becomes orange, try using blue shampoo to fix it, because on the color wheel, blue is directly across from orange, so blue is better to fix orange, and your hair root will become deep gray or black color.

Isee Wear Go Pre-bleached Knots Wig

pre-bleached knots wig

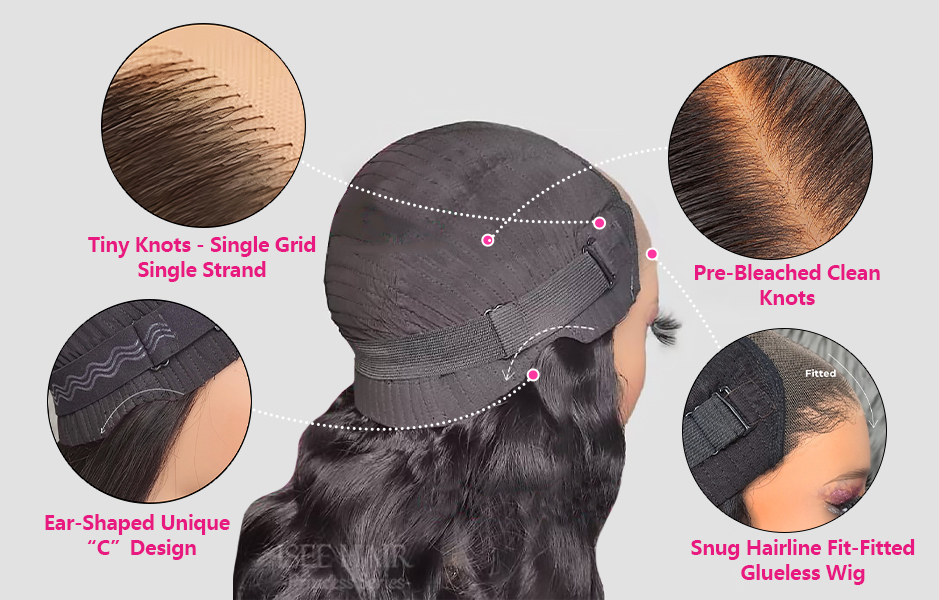
Bleaching knots on wig can be a challenge thing, especially for beginners. It has the chance to be over-bleached and not bleached well to your desired level. In this case, you can choose to try Isee pre-bleached knots glueless lace wigs, which are pre-bleached by the professional team and give a very natural scalp like appearance.

FAQ Of Bleaching Knots

How to avoid over-bleached?

Not make the bleach mixture watery or pushed your bleach too much in the lace, it’ll seep through and make your roots turning brown or blonde. Check your bleaching knots process frequently in every 10-15 minutes, once your wig well-bleached, wash the bleach mixture out right now.

Do you use a conditioner after you shampoo?

Yes, after washing the wig, use conditioner to keep the hair soft, more shiny and moisture.

Does bleaching make the unit shed faster?

No. Bleaching might can damage your hair but will not cause hair to sheds. It won’t cause any alarming problems like hair sheds, hair breakage just because you bleached your knots.

Do I need to use aluminum foil?

Of course you can not use aluminum foil. It's just aluminum foil can heat up and bleach better.

Can you pluck first and then bleach the knots?

You can, but I suggest you bleach knots on wig first and then pluck it. For the bleach softens the knots and makes hair easier to be plucked.

Do I need to use a neutralizing shampoo?

A neutralizing shampoo make sure the chemicals from bleach are completely out the hair. It removes all bleach and stops the chemical reaction.

Comments | Posted in Wig Install By lou ruili

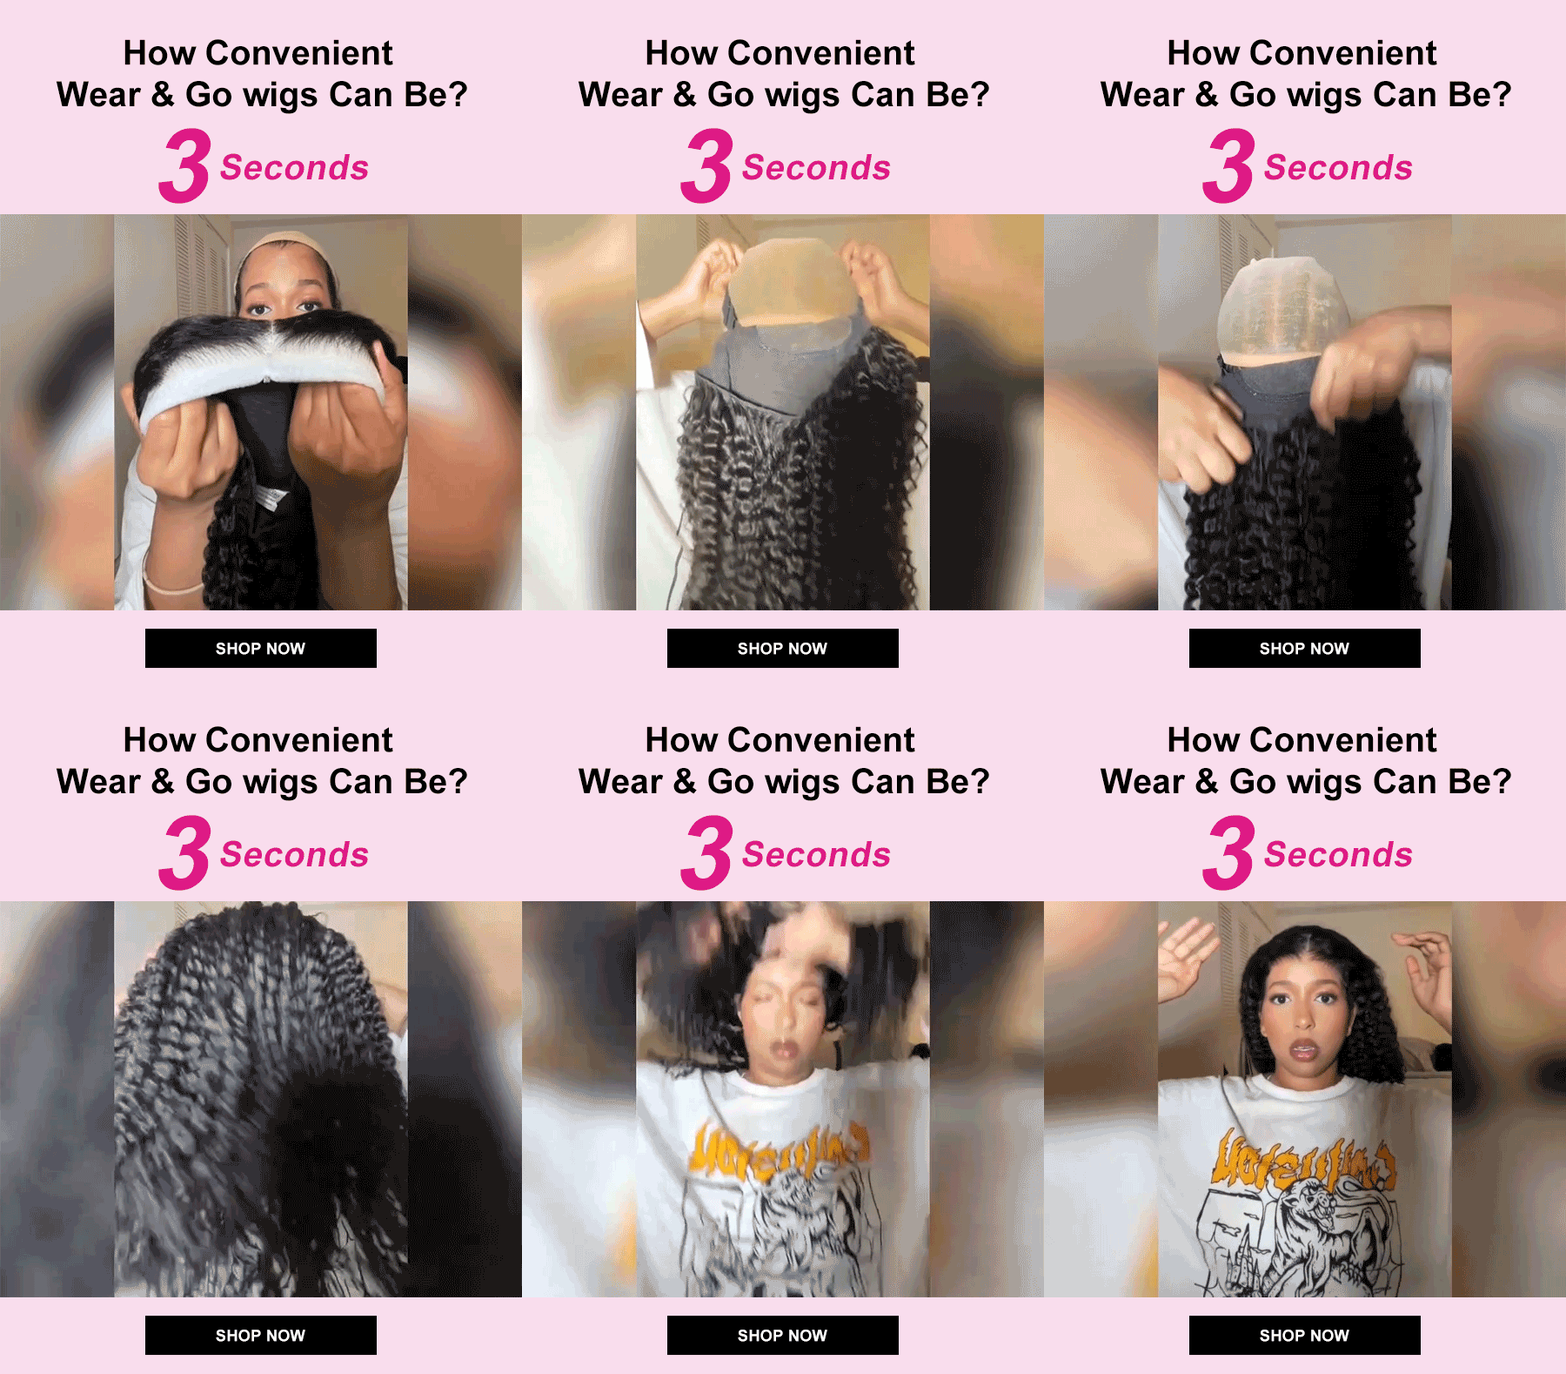
How Convenient To Install Wear & Go Wigs

Monday, June 19, 2023 4:58:48 AM America/New_York

Wear & Go Wigs

How Convenient To Install Wear & Go Wigs

How Convenient To Install Wear & Go Wigs

How Convenient To Install Wear & Go Wigs

How Convenient To Install Wear & Go Wigs

How Convenient To Install Wear & Go Wigs

Comments | Posted in Wig Install By lou ruili

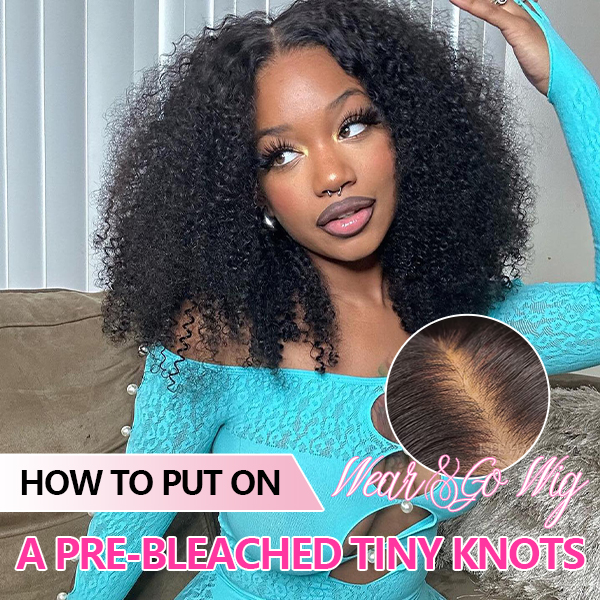
How To Put On a Pre-Bleached Tiny Knots Wear&Go Wig?

Friday, October 13, 2023 5:18:59 AM America/New_York

When Wear&Go wigs were introduced and marketed by ISEE in 2022, they quickly became popular in the wig business. With innovation in mind, recently, we upgraded our technique to develop the bleached tiny knots Wear&Go wig.

However, properly putting on a bleached tiny knots Wear&Go wig with precision is key to maximizing its potential. So in this blog post, we'll take you through a step-by-step guide on how to put on a bleached tiny knots Wear&Go wig and related maintenance tips.

How To Put On a Pre-Bleached Tiny Knots Wear&Go Wig?

Understanding What Is a Bleached Tiny Knots Wear&Go Wigs

"Bleached tiny knots" in the context of wig construction refer to a technique used to mimic the growth of natural hair from the scalp and create a more natural and realistic appearance. It is a new technique developed by ISEE on Wear&Go wigs that is presently exclusively applied to ISEE Wear&Go V5 and ISEE M-cap 9×6 wigs, with the goal of making Wear&Go wigs the most realistic when putting on while giving people as little as possible to detect you are wearing a wig.

How To Put On a Pre-Bleached Tiny Knots Wear&Go Wig?

How To Install a Wear&Go Wig a Step-By-Step Guide

This is going to be a very easy and straightforward install process that's beginner friendly. Without further ado, let's witness it together.

Step 1: Preparing your Natural Hair

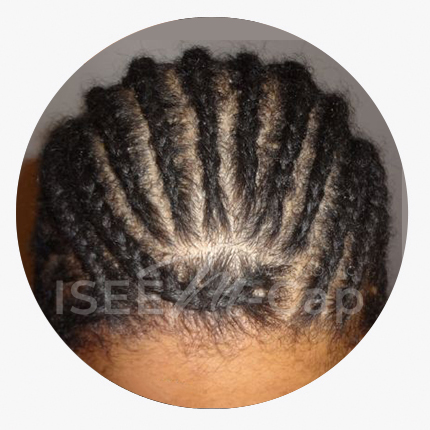
The main purpose of this step is to make your natural hair as flat as possible. Flatten your hair is a step that no one should skip and no types of wigs should miss, even Wear&Go wigs. Because the wig could sit too high on your head if you apply it on unprepared hair. This would make it obvious that you are wearing a wig. Want know more about specific and detail ways to prepare your hair? Please shift your attention on our another blog post how to hide hair under a wig cap.

Step 2: Put on the wig cap

Put on a wig cap to hold your natural hair in place and create a smooth, flat surface for the wig to sit upon.
Stretch the wig cap over your head. It should fit snugly and comfortably, covering all of your natural hair. Tuck in any loose strands.

Step 3: Adjust the elastic band

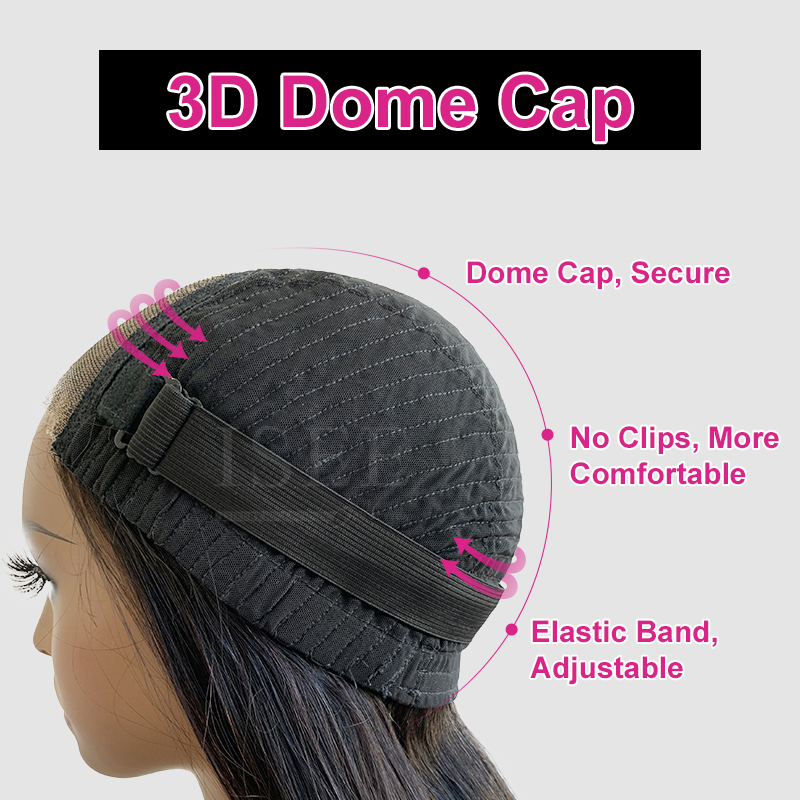
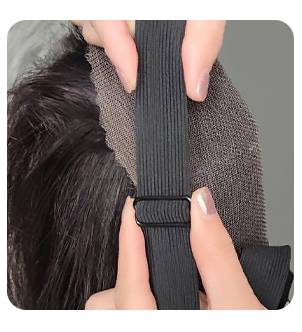
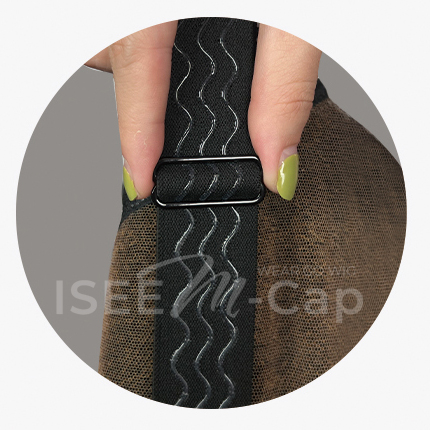
For a bleached tiny knots Wear&Go wig, the 3D Dome cap has an elastic band inside. To make sure it fits properly, hook the piano keys in the appropriate spot to adjust the band's tension, make it tighter or looser. Everybody has a unique head size that varies from person to person.

How To Put On a Pre-Bleached Tiny Knots Wear&Go Wig?

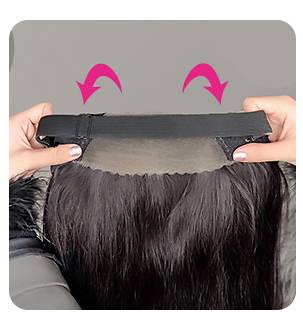
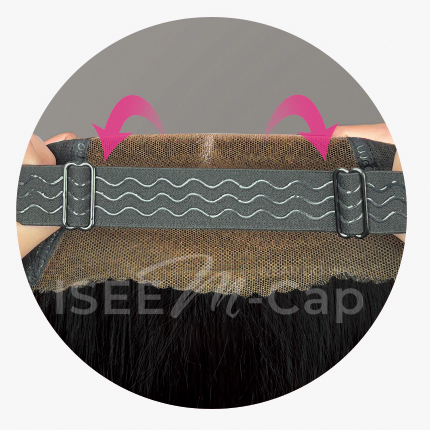
Step 4: Fold the lace edge in reverse

By pre-folding the lace edge in reverse and securing it in this manner, you'll maintain a smooth and natural-looking hairline when you wear your wig. This prevents any unsightly folding or bunching of the lace and contributes to a seamless and realistic appearance. This is a critical but easily overlooked step for Wear&Go wigs.

How To Put On a Pre-Bleached Tiny Knots Wear&Go Wig?

Step 5: Put on the wig

You may experience 3 seconds of quick and effortless wearing after completing the steps listed above.

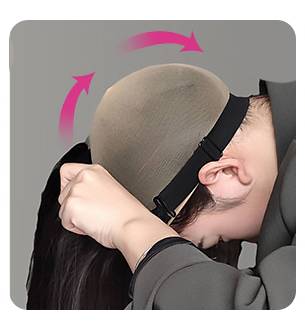
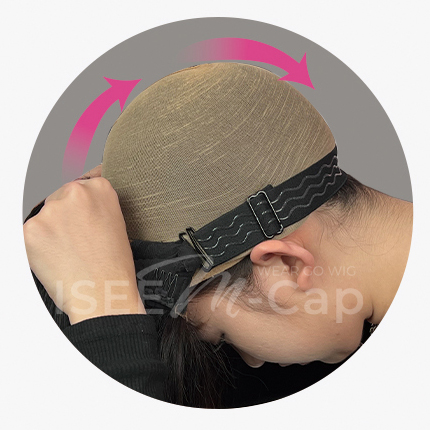
Begin by aligning the lace edges of the wig with your forehead. Make sure that the front edge of the wig, where the lace is attached, sits along your natural hairline for the most realistic appearance and reducing unnecessary adjustments in later steps.
Then, with your head slightly tilted forward, pull the elastic band at the back of the wig, ensure that it is ready for use. Make sure to attach the elastic band first for a secure fit.
Lastly, with a fluid motion, slide the wig backward, and finish attaching the wig.

How To Put On a Pre-Bleached Tiny Knots Wear&Go Wig?

Step 6: Final adjustment

In the mirror, adjust your hairline to the proper place for a flawless fit!

How To Put On a Pre-Bleached Tiny Knots Wear&Go Wig?

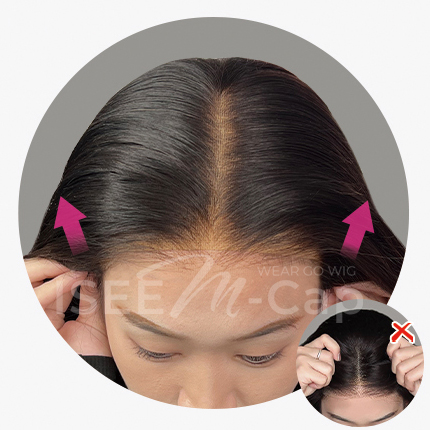
Note: Throughout this process, take care to avoid pulling the front hair and lace away from your forehead. Instead, gently guide the wig into position without disrupting the lace and hair strands along the front.

The Importance Of Proper Installation

Absolutely, properly installing is incredibly important for any types of wig. Here are a few reasons why proper installation is essential for a bleached tiny knots Wear&Go wig:

Longevity and Durability

Proper installation techniques can extend the lifespan of your bleached tiny knots Wear&Go wig. When the wig is secured correctly, there will be less tension on the hair strands, reducing the risk of breakage or shedding. Additionally, a secure attachment will prevent the wig from rubbing against your natural hair, preserving its quality over time.

Comfort and Confidence

A well-installed Wear&Go wig should feel comfortable and secure, allowing you to go about your day with confidence. When the wig is properly attached, you won't have to worry about it shifting or coming loose unexpectedly. This peace of mind will help you feel more comfortable and at ease in any situation.

Realistic Appearance

By following the correct installation techniques, you can ensure that your bleached tiny knots Wear&Go wig looks as natural as possible. The carefully bleached knots and secure attachment will create a flawless hairline that mimics the appearance of natural hair. Proper installation will prevent the wig from looking bulky or ill-fitting.

Tips For Maintaining And Caring For Your Bleached Tiny Knots Wear&Go Wig

Once you have successfully installed your bleached tiny knots Wear&Go wig, it's important to maintain and care for it properly to ensure its longevity and keep it looking its best. Here are some essential tips for caring for your wig:

Gently brush-It's crucial to brush your bleached tiny knots wig as gently as possible. Your fingers are the best tool for removing any tangles or knots, so try to utilize them. Or you can use a wide-toothed comb or a wig brush. Being careful not to pull or tug on the hair strands.

Properly store-Avoid storing your bleached tiny knots wig in a plastic bag or airtight container, as this can cause moisture buildup and damage the hair fibers.

Knot Maintenance-To maintain the appearance of the bleached knots, avoid harsh or excessive brushing or combing near the knot area. Gentle handling will help preserve the bleach treatment.

Wearing a wig cap-Wear a wig cap underneath your wig to protect small knots from friction and rubbing. This not only prevents the wig knots from falling out and creates a barrier between the wig and the scalp, but it also helps to keep the wig securely in place.

How Do You Keep a Bleached Tiny Knots Wear&Go Wig From Slipping?

ISEE Wear&Go wigs have an adjustable elastic band at the back. This band is designed to secure the wig in place. If you find that the wig is slipping or feels loose, carefully adjust the elastic band to make it tighter. If it feels too tight or uncomfortable, you can loosen it slightly for a better fit. It should feel secure but not overly tight.

How Long Does a Bleached Tiny Knots Wear&Go Wig Last?

The lifespan of a bleached tiny knots Wear&Go wig depends on various factors, including how well it is maintained, and how frequently it is worn.
With proper care and maintenance, these wigs can last anywhere 1-2 year with proper care or even more.

Conclusion

By following the step-by-step guide and incorporating the tips and precautions mentioned in this article, you can not only effectively extend the lifespan of a bleached tiny knots wig, but achieve a flawless and natural look that enhances your beauty and boosts your confidence. So go ahead, embrace the convenience and beauty of a Wear&Go wig!

You might want to check these posts:
Unlocking the Secrets of Tiny Knots Wig Care: A Comprehensive Guide
What Is a Glueless Lace Wig?

New Natural Kinky Hairline Wear Go Pre Cut Kinky Straight Glueless Wig

How To Put On a Pre-Bleached Tiny Knots Wear&Go Wig?

ADD TO CART

ISEE M-Cap Water Wave 9x6 Tiny Knots Pre-Bleached Wear Go Wig

How To Put On a Pre-Bleached Tiny Knots Wear&Go Wig?

ADD TO CART

Comments | Posted in Wig Install By fang

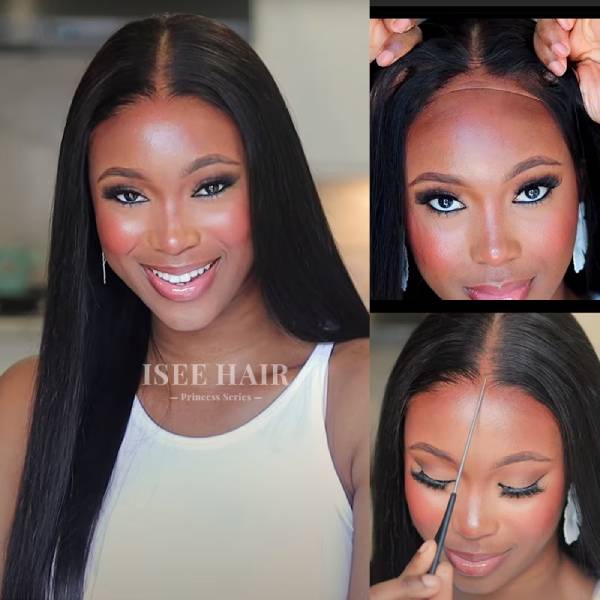
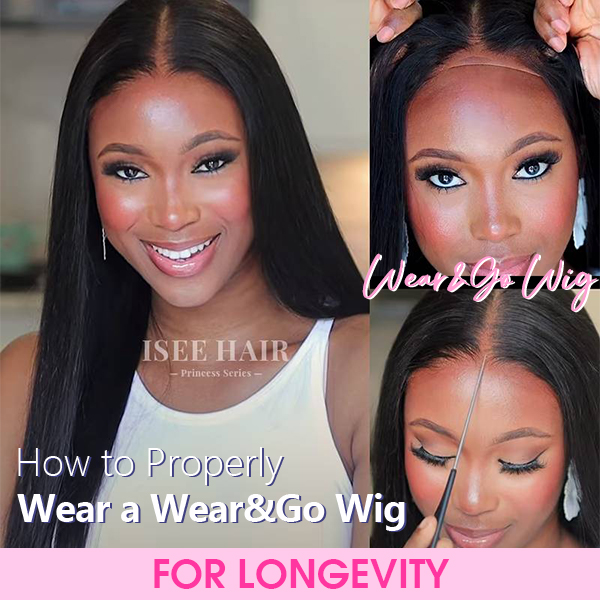
How to Properly Wear a Wear&Go Wig for Longevity

Thursday, October 19, 2023 2:32:48 AM America/New_York

This blog post is primarily about how to properly wear a wear&go wig for longevity.
It's concise and clear. Let's take a look together.

how to properly wear wear and go wig

Step 1: Preparing your Natural Hair

Flatten your hair to create a smooth base, ensuring the wig sits perfectly and looks natural.

how to properly wear wear and go wig

Step 2: Put on the wig cap

Wear a wig cap to secure your natural hair. Stretch it over your head,
covering all your hair, and tuck in loose strands.

how to properly wear wear and go wig

Step 3: Adjust the elastic band

Adjust the tension of elastic band and hook the piano keys in the appropriate spot
to ensure the wig stays secure and fits properly.

how to properly wear wear and go wig

Step 4: Fold the lace edge in reverse

Fold the lace edge in reverse to avoid damaging the pre-made fashionable hairline
and prevent any unsightly folds or bunching.

how to properly wear wear and go wig

Step 5: Put on the wig

Align the lace edges with your forehead, tilt your head slightly forward
to prevent the wig hairstyle from getting messy, and attach the elastic band at the back.
Slide the wig backward to secure it.

how to properly wear wear and go wig

Step 6: Final adjustment

In the mirror, adjust your hairline for a flawless fit! 
Note that adjustments are made with hair in the weft part instead of lace part.

how to properly wear wear and go wig

Friendly Tip: Add some powder will look more natural!

Be gentle and avoid tugging on the front hair and lace during the whole process.

-check here for more detail wear&go wig installation-

Comments | Posted in FAQ Wig Install Beginner Guide By fang
Set Descending Direction

6 Item(s)

DMCA.com Protection Status
© 2025 Iseehair Inc. All rights reserved